Hey Everyone!
Since my last post announcing the new comic project that I'm working on (click here if you missed it!) I've been sharing some more sneak peeks of pencils and inks on social media, so I thought it was high time I introduced you all to a couple more of the characters who have featured in them!
The first character I'm going to share concepts of today was actually the first character I drew! Though he doesn't play a big part in the story, mixing an aquatic animal with a cast of land mammals was always going to be a design challenge. How I decided to draw this guy would ultimately influence the design of the rest of the cast! I mean, do I draw a human shaped bodies with animal heads and tails? Or do I draw and animal shaped bodies that stand on two legs, wear clothes and talk?
If you're familiar with my previous work on MULP: Sceptre of the Sun, then you'll know that I favour the latter of those two styles... So when then script called for a Great White Shark character, I wondered if it'd be possible to draw him as a real Shark would look, but on land and wearing a suit!
As ridiculous as that sounds, I'm pretty happy with the outcome!
So without further a-do, let me introduce to you our King of Crime, the Mob Boss, Godfather, Kingpin and cruel Loan Shark.. Bruce!

Bruce's design was inspired by and mixture of Marvel Comic's Wilson Fisk (Kingpin) and the character from Shark Tale that Robert De Niro voices (Don Edward Lino), with a good dose of Bruce the Shark from Finding Nemo.
Because our Bruce operates on land, I needed to make a Shark's survival out of water plausible if he was going to look like an actual Shark! The collar around Bruce's neck was inspired by the breathing apparatus that Abe Sapien wears in Guillermo Del Toro's Hellboy adaptation, allowing the amphibious Abe to walk on land for extended periods. The idea behind Bruce's collar is that water flows through the tubes from a tank on his back, over his gills, allowing him to breathe on land. I also saw him getting about in a huge motorised wheelchair (Professor X style) flanked by lackies and henchmen to do his dirty work for him, however this detail doesn't appear in the comic.
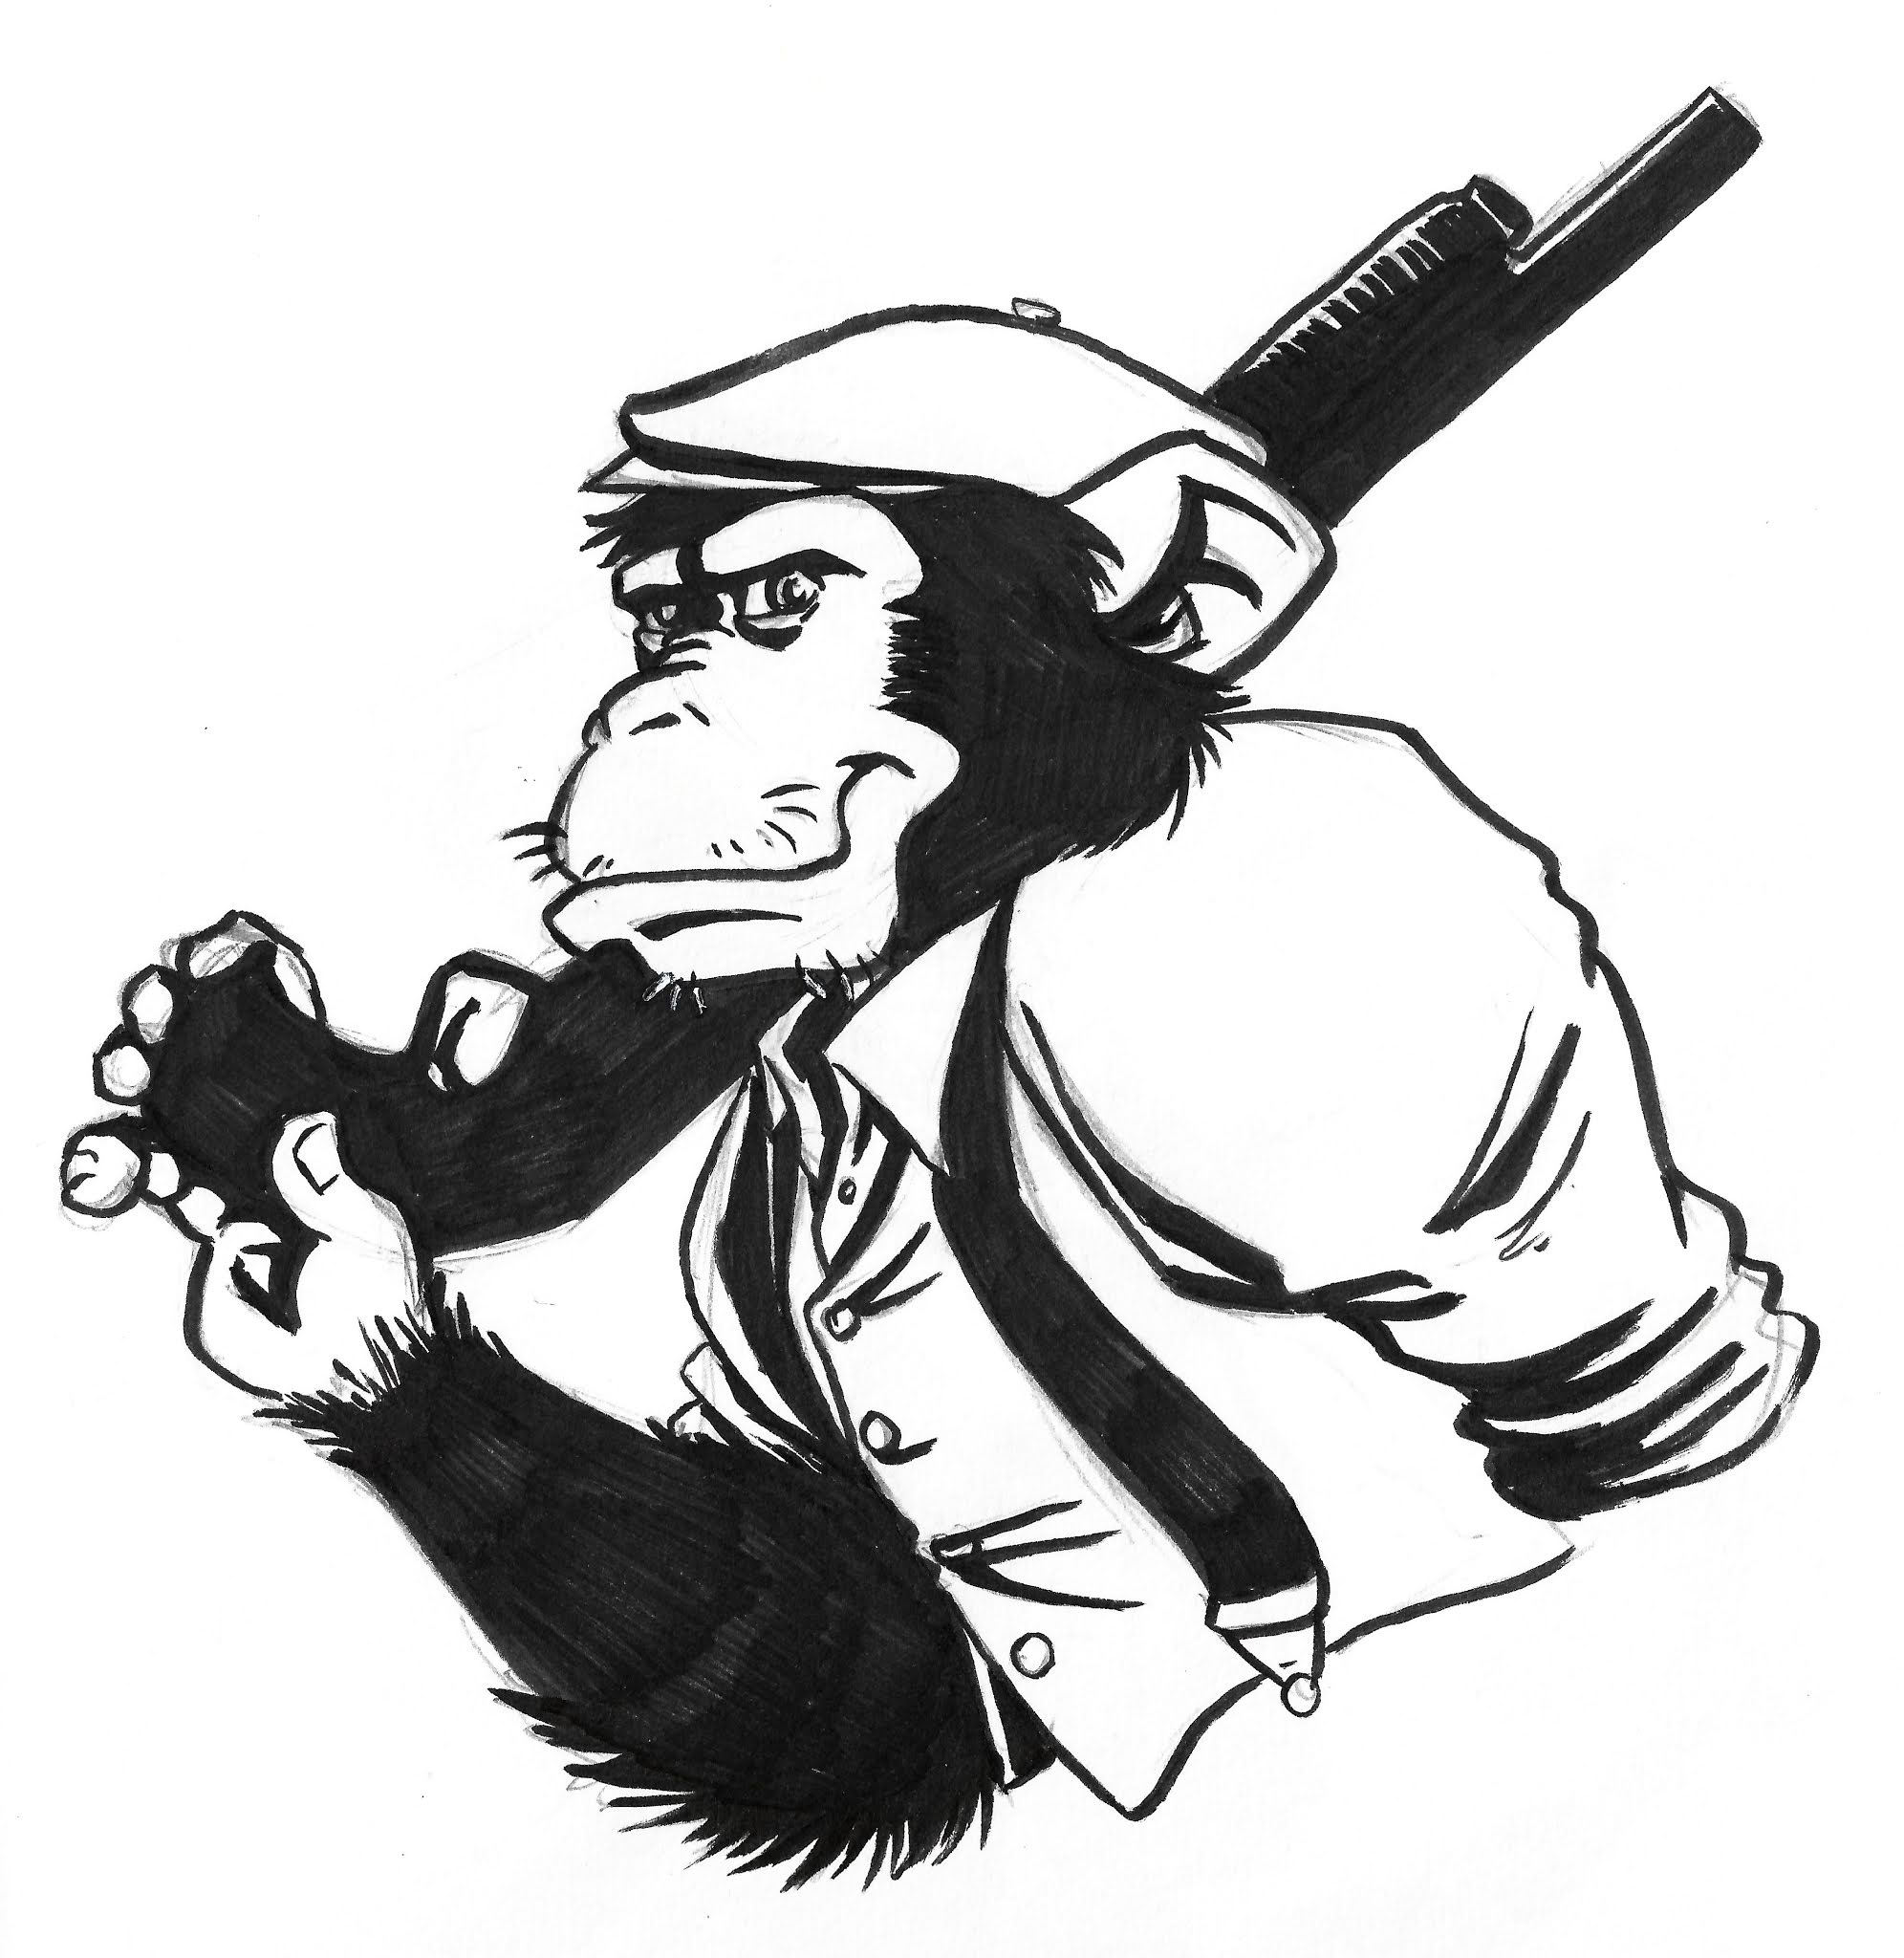
The final player in our cast of miscreants is Bunky the Chimpanzee.
Bunky is Sebastian's faithful flunkey. He's a cheeky chappy, streetwise and quite rough around the edges, but with a good heart for a petty criminal!


Inspiration for Bunky's design came partially from DC's Detective Chimp character but mostly I heavily relied on real life reference photos of Chimpanzees, those guys have enough charisma that practically draws themselves!
As I mentioned before, I've been sharing sneak peeks at the progress of this comic over on my various social media outlets!
Here's a little look at these characters on the page.